
What is a christmas without breaking stuff (In the last week my battery died in the car, pipe burst inside our washing machine and had central heating issues)
So I though why not mess with HomeAssistant as well 😏 I have a small SuperMicro server that I have not used for a while, so I decided I wanted to try an run UnRaid on it to move my HomeAssistant from my Raspberry PI 4.
But after some research I discovered that some people claimed that issues could occur running UnRaid on a machine that purely has SSD’s because of some TRIM issues with BTRFS.
So I decided to try out the new TrueNAS Scale which runs on Debian so I could use KVM and Docker instead of Bhyve and Jails (Be aware it is still only a Release Candidate)
This is not a guide on how to use TrueNAS Scale this is just getting HomeAssistant running as a VM inside of TrueNAS
(Word of warning I am not a Linux guy, so I might have overlooked something that could have made this simpler)
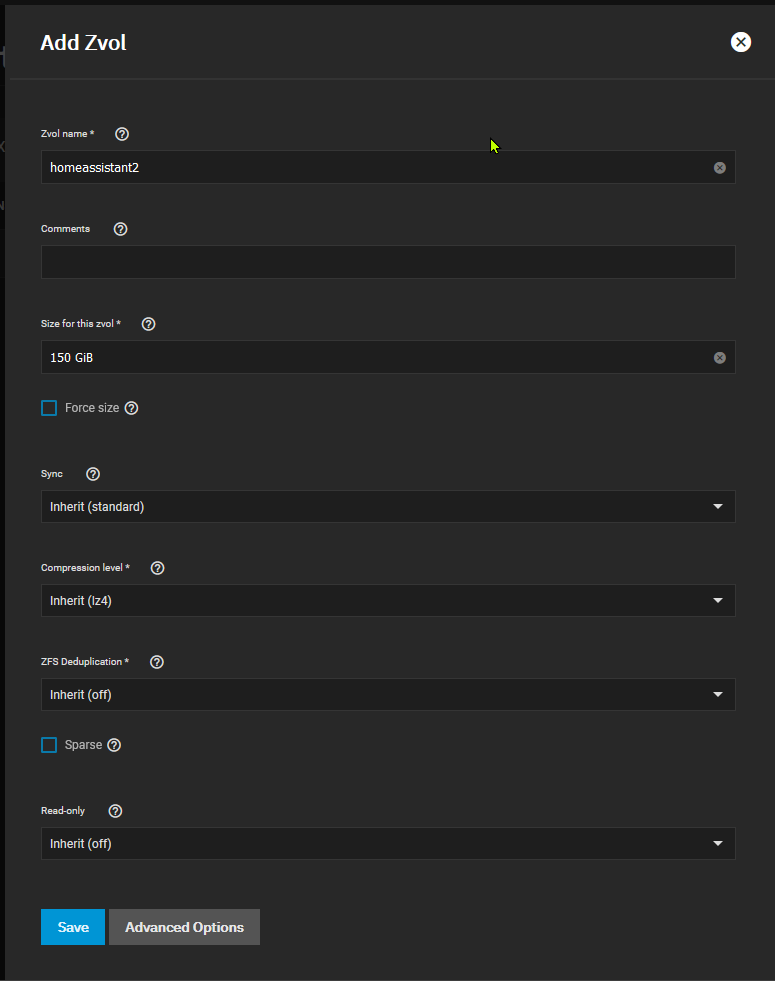
Under storage you have to create a new zvol
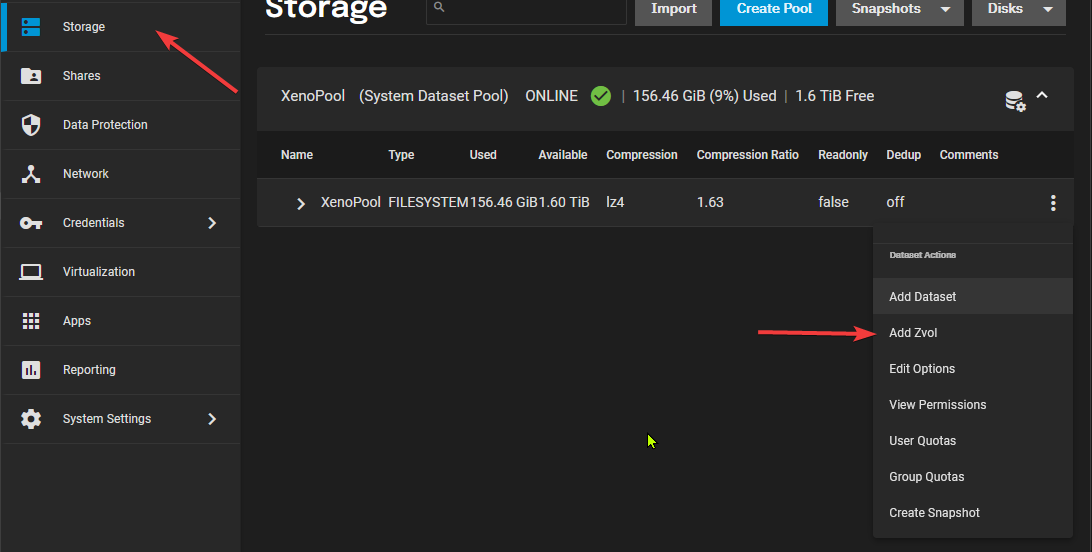
Then you give it a name and a size and decide what other ZFS features you want to enable… (I have just left them with their default values)
Then I had to go to the shell under System Settings
First I had to download the HassOS image (I have recently done some converting from vmdk to Qemu/KVM at work, so I chose to download the .ova file, because I knew the commands to convert it)
wget https://github.com/home-assistant/operating-system/releases/download/7.1/haos_ova-7.1.ova
Then you have to unpack it
tar -xvf haos_ova-7.1.ova
Convert it to an img file that we can dd to the zvol we created
qemu-img convert -f vmdk -O raw /mnt/XenoPool/home-assistant.vmdk hassos.img
Then we have to use dd to copy the image data over this took about 25 minutes for me (XenoPool = StoragePool name, homeassistant = zvol name )
dd if=hassos.img of=/dev/zvol/XenoPool/homeassistant
Currently there does not seem to be a way to map in USB peripherals from the UI, so we have to do that from the shell as well, but we will get to that in a bit.
Next step you go to Virtualization in the left menu and click the blue Add button
- Operating System - Here you say which OS (Linux) and give the machine as name
- CPU and Memory - Decide the amount of resources your machine needs
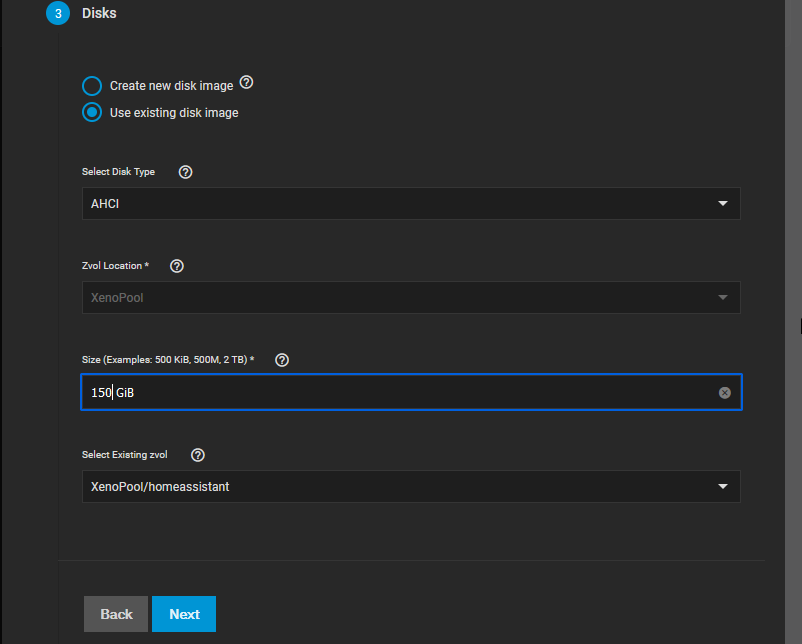
- Disks - Here you select Use Existing Disk and the size of your disk, and then point it to the zvol you created earlier
- Network Interface - Just left the default values
- Installation Media - Just left the default values
- Confirm Options - Just click save
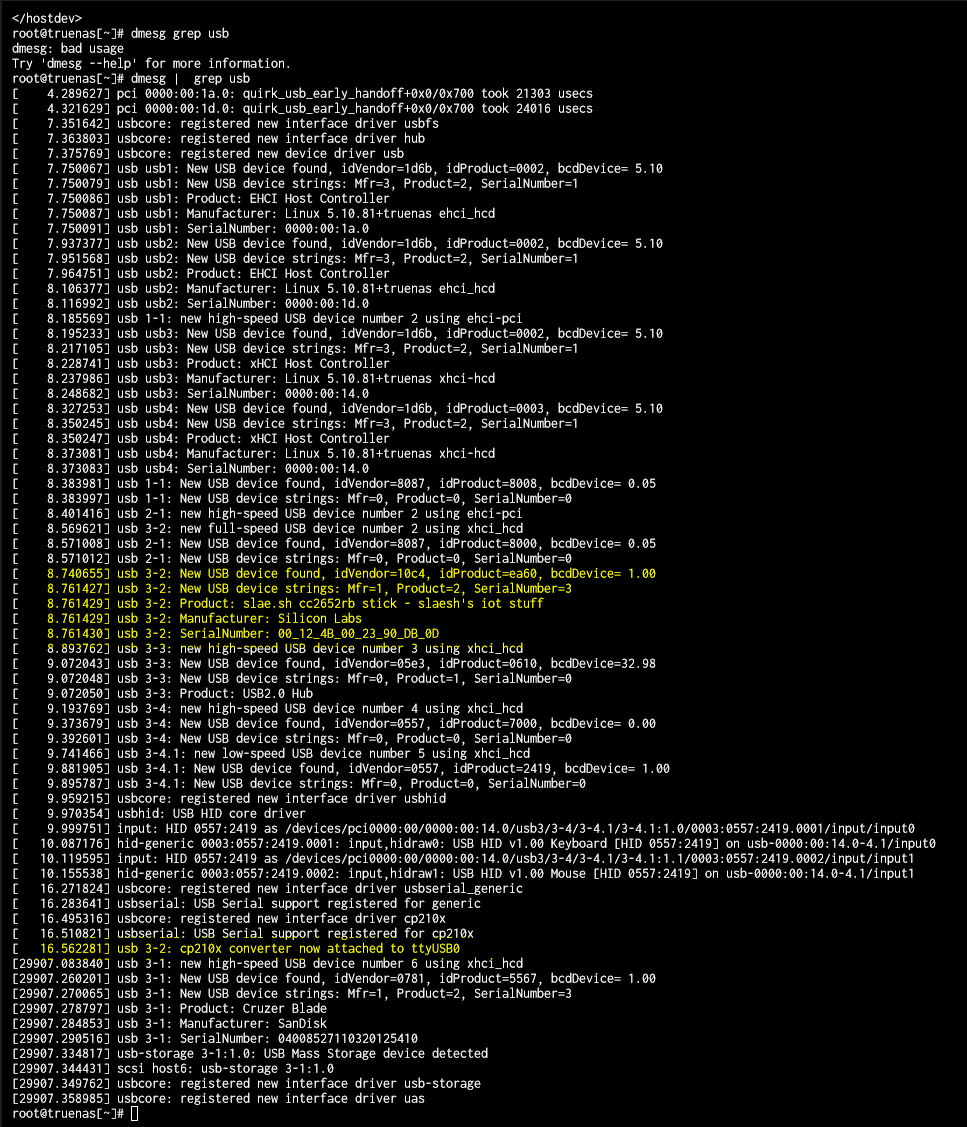
Now I was able to boot HomeAssistant by starting the VM, but I still needed to load my Slaesh Zigbee stick I tried running lsusb from the shell, but that was not installed, so I had to try and figure out the USB information from dmesg
dmesg | greb usb
In order to map it into the machine I need the idVendor and idProduct
Then I created the an addusb.xml file containing
<hostdev mode='subsystem' type='usb'>
  <source>
    <vendor id='0x10c4'/>
    <product id='0xea60'/>
  </source>
</hostdev>
Since libvirt is not running on the default socket in TrueNAS Scale I have created this alias for virsh
alias virsh='virsh -c "qemu+unix:///system?socket=/run/truenas_libvirt/libvirt-sock" $1'
Then I needed to figure out the name of the VM
virsh list
Then we have to run the virsh command to tell it to map the USB to the VM ( vmname = 1_homeassistant)
virsh attach-device 1_homeassistant --file /root/addusb.xml --config --persistent
This made the Slaesh USB stick show up inside the VM and I could configure it for use with HA
Currently it seems as when TrueNAS restarts the VM it will overwrite the config, meaning that the USB device will be disconnected, and will have to be connected again.
I hope this can help someone getting HA up and running faster than I did 😄